How To Make a Birthday Chalkboard without Photoshop!
Who has been to a birthday party where they had super cute chalkboard posters? I should ask, who has not?? We all have. And they are super adorable. Most moms assume they are expensive to design, or out of their tech range for creating on their own. But they aren’t! I can’t wait to show you how to design one for free and print it off quickly!
(This post contains affiliate links. If you shop from my blog, I may be compensated for clicks or purchases that you make. Read my disclaimer page for more information.)
I love Etsy. LIKE WAY TOO MUCH. And when it comes time for a first birthday party, I really want to have one of those cute chalkboard posters that you can buy from Etsy. However, my budget doesn’t allow me to buy everything I want from Etsy. So what is a mama to do? Make her own! You might be thinking, now I don’t have Photoshop to make one of those.
Well, guess what, Momma, neither do I!
It’s not a must-have for this woman and you don’t need it either for this project! I will step you through how to make the poster in.. wait for it… PowerPoint. Yes, that PowerPoint!
What You’ll Need for Your DIY Birthday Chalkboard
-
- Fonts & Dingbats!
- PowerPoint
- Background Image
- The Free Birthday Cheatsheet (Found in My Resource Library!)
- Printing Service ( I recommend Office Depot*, Shutterfly*, or Walgreens*)
Downloading Fonts
Since you will use only PowerPoint to build this chalkboard, you will need to download several free fonts and dingbat fonts. What is a dingbat? It’s essentially a little design in place of a letter. For instance, in “Sleep on the Moon” font, the letter ‘j’ is cute little airplane! The dingbats allow you to go overboard and personalize your chalkboard!
I used these free fonts to build my chalkboard:
- Return to Sender
- Clementine Sketch
- Sandwich Paper /Light/Dark
- KG Second Chances Sketch/Dark
- Pea Ellie Bellie
- A Song for Jennifer
- Chalk Line Outline
- Made with B
Dingbats:
To download a font:
Click on the link –> Download –> Open the file in your downloads –> Click Install SUPER EASY!
Now, when you open up the file to Install, take a look at all the characters. This is what your font looks like! This is a quick cheat to see your dingbat characters and learn which letters create which dingbat. Keep this handy when you are designing!
Related:
- Minnie Mouse Birthday Party Ideas
- How to Make a Birthday Poster in Canva
- How to Host a Birthday Dinner & Keep Your Sanity!
Setting Up Your Design
Next, you will need to open up PowerPoint and change the slide size. Start with 16″ x 20″ portrait to give you a nice sized poster. The larger you build, the lower the resolution. Do as I say, not as I do as I’ve always printed off 24″ x 36″ <– Sorry for the bad influence!
Keep in mind that you truly do not have the entire surface to play with. Be generous and give yourself atleast 1/2 – 1 inch around the outside for printing guidelines.
- Related: Rubber Ducky Birthday Party Ideas
Adding the Chalkboard Background
Next you’ll need to download a chalkboard background. I use this one, here. To ensure full resolution, click on the link pf the image and click on the image once to zoom in. Right mouse button, ‘Save As’ and save the file.
This image is extremely large. If you don’t need a 3MB file (seriously), search for chalkboard background, click once to zoom in and save. If you do the search make sure to filter your Google Images to items, ‘Extra Large.’ You need it to be clear, not grainy.
Back in PowerPoint, go to the Design tab and choose format background. Insert your chalkboard image. If the chalkboard looks too perfect, you can rough it up a bit by changing the transparency, adding an artistic effect, or change its Brightness Preset. Experiment, you can really change it to your own personal taste.
Decorate the Birthday Chalkboard!
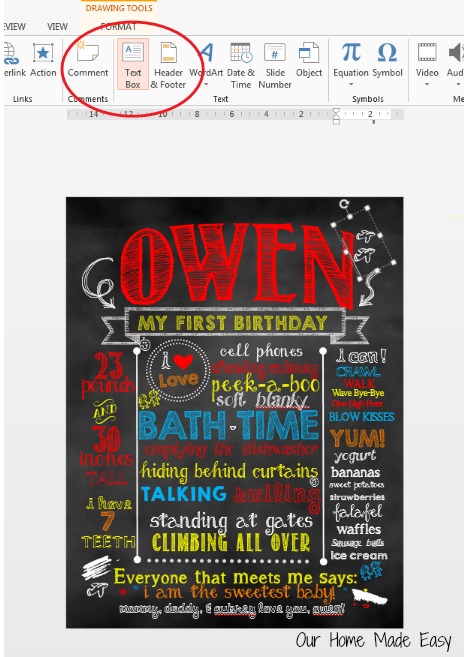
Now, begin inserting text boxes. Use the boxes to add your fonts and dingbats. This is the time to go overboard and fill it with all kinds of silly objects. Just remember to leave a generous border of background around the outer edge.
Insert lines and other shapes to help separate your columns. Take advantage of the line designs that you don’t normally get to use. Change the transparency and start/end points.
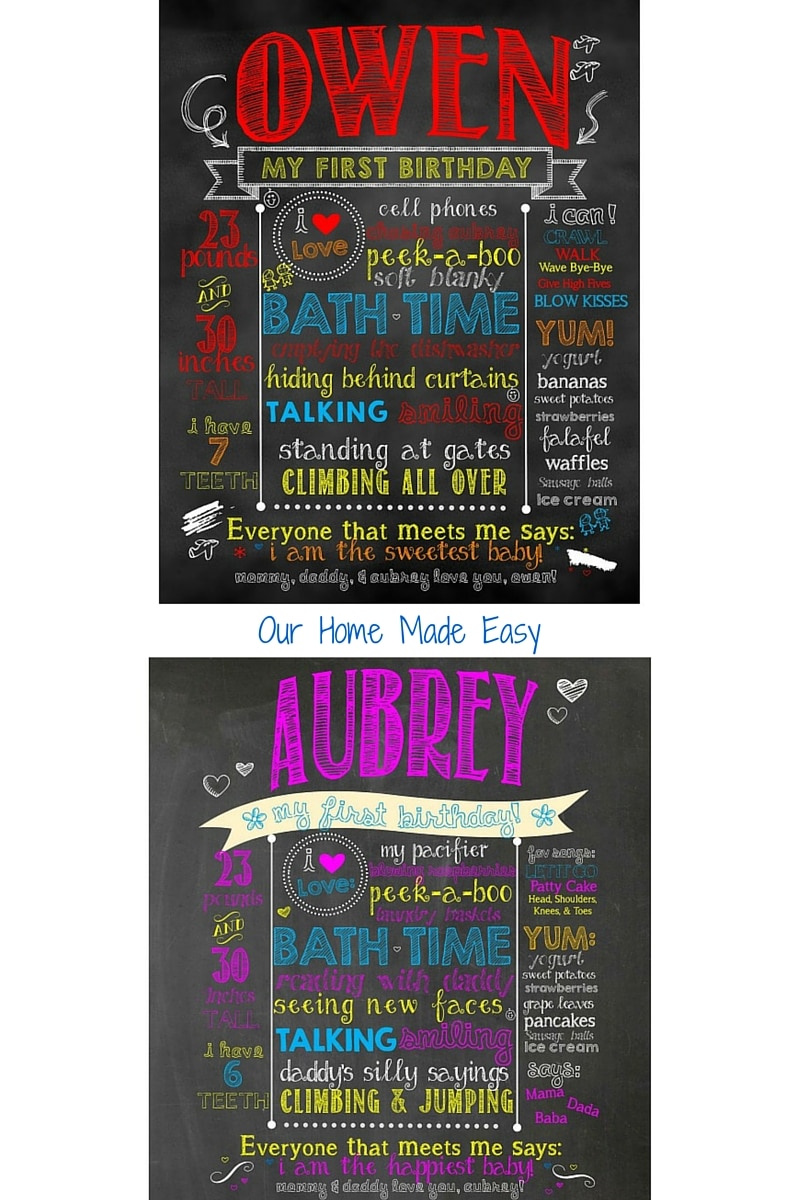
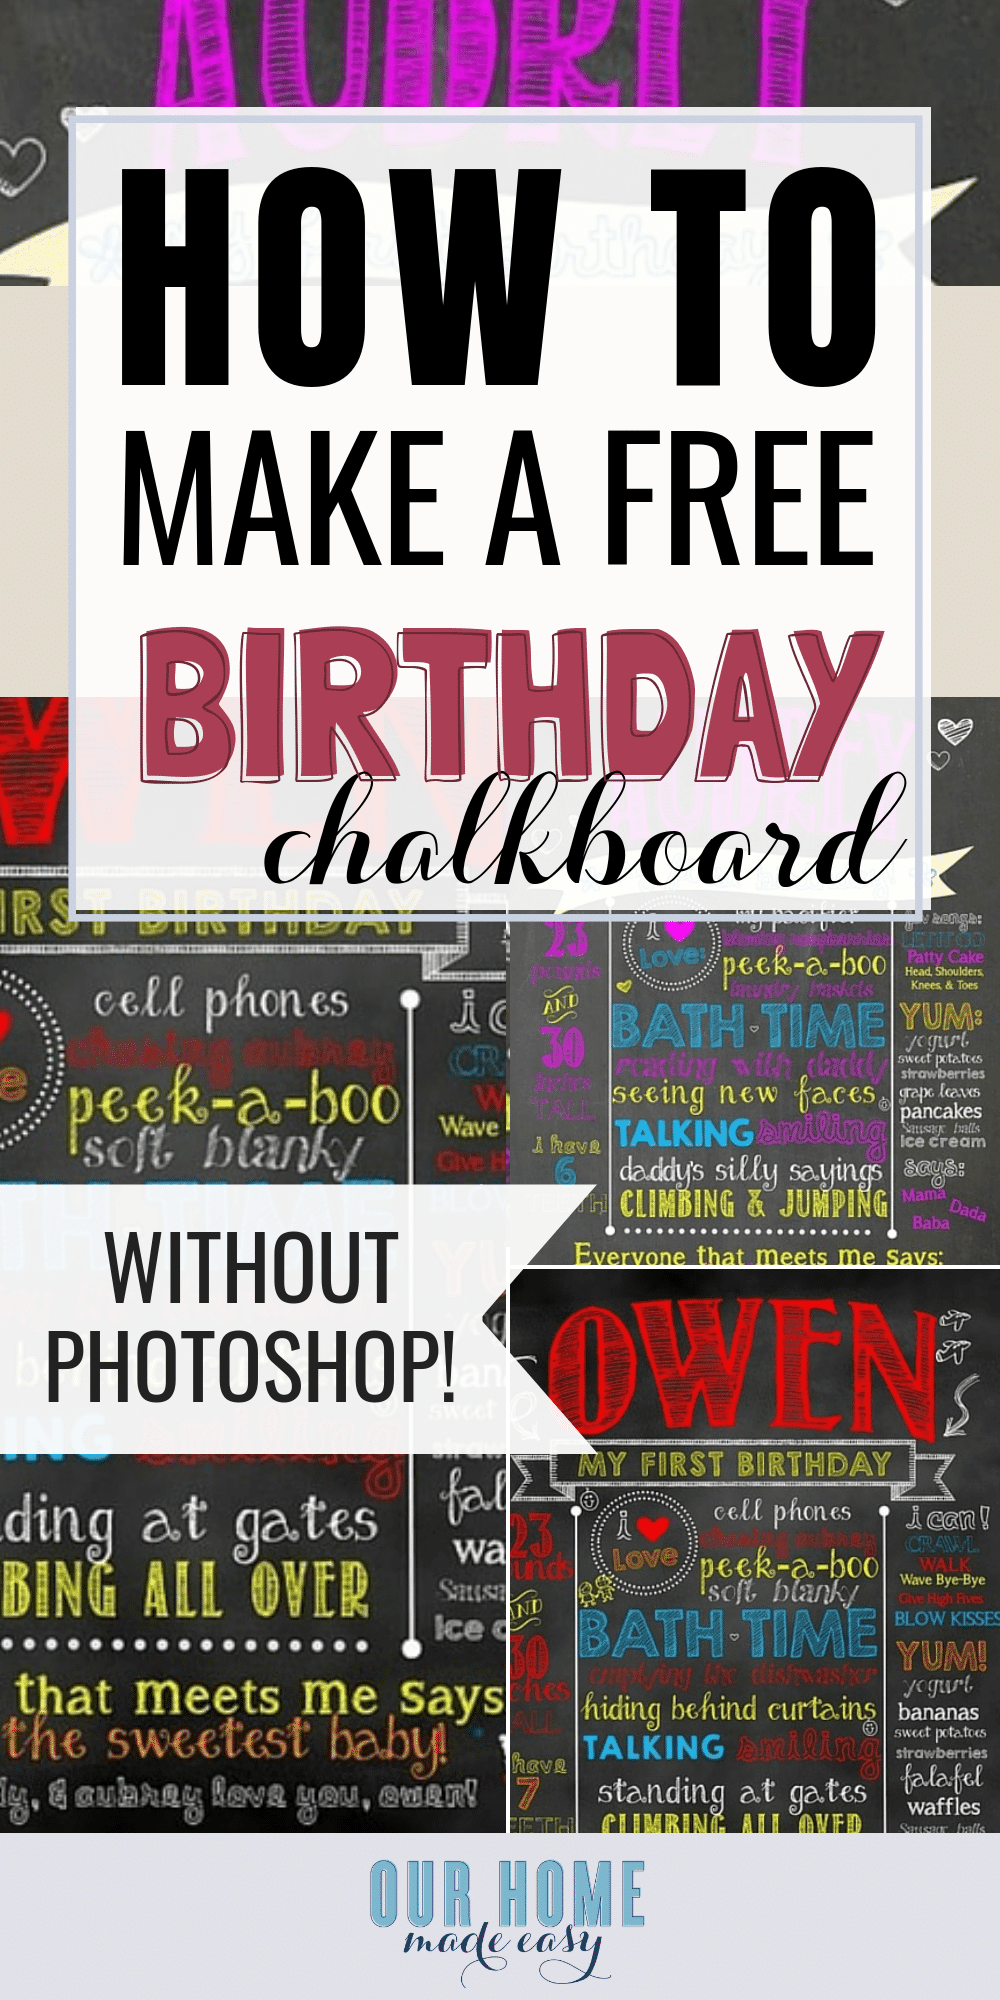
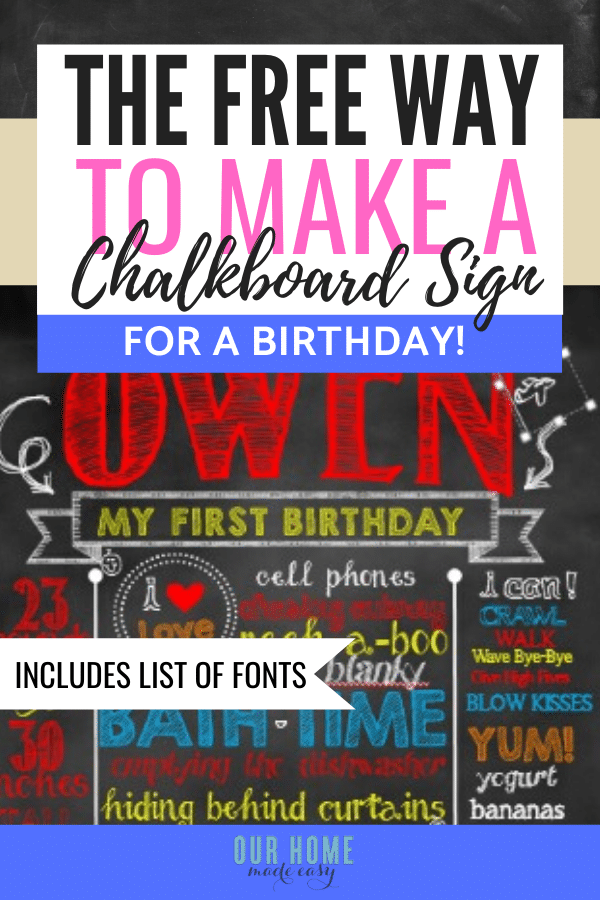
For the banner surrounding Owen’s “My First Birthday,” I found a free chalkboard clip art banner. Google your keywords and like, the background, you will find LOTS of options!
You may end up changing the text colors several times before you find the right balance. To add more pizazz, add chalkboard images that coordinate with your party theme!
- Related: Construction Birthday Party Ideas
Send it to a Printer
Save the file as an image. PowerPoint will ask you if its only the current slide. Say yes and rename it. Now it’s in a .JPEG or .PNG file that is ready to be printed!
Print Options:
Office Depot has print pickup which is great too for busy moms! You upload your image and order it online. Then it’s ready about an hour later (they keep you updated). If you have several days to wait for your print you can choose Shutterfly or Walgreens. All places print these off well enough and quickly.
In addition, they both use a printing software that doesn’t force the image to fit a certain size like other photo places do. For instance, my printed posters always have a white border on the tops and bottoms because they become too wide (learn from my mistakes!).
Rather than forcing the height fit correctly like some other places, they will print it as white spaces and you can simply trim off the excess. Thus you do not have to worry about smushing or distorting an image.
Your printing options could be as simple as a poster or you could choose foam board. Foam board is excellent for stability. While the poster paper has to be hung up on a wall or placed in a poster frame on an easel.
Before you checkout online, take a look and see if any if the stores have a coupon. There is usually a percentage off your order. Yes!
I can’t wait to see your artwork!
I hope that you’ve found this tutorial helpful in creating your chalkboard! You’ll find that personalization does not have to be expensive and with a few minutes time, you can create something super special for your little one! Be sure to download the fonts, install them, and order the print. It’s so fun displaying (and taking birthday kid pictures with, too)!
PIN FOR LATER:


I need help. I have downloaded font and installed the fonts. When I try use select font type they are not an option. Can you tell me once I open a text box on the power point how to I select a font I downloaded?
Thank you
Oh no! Once you have clicked ‘Install’ for the font, are you closing PowerPoint and re-opening the file? I’ve found that reopening reindexes the font and allows you to see it. The font should be in alphabetical order in your font list. -Brittany
I can’t get the banners to show up once there downloaded on my computer. do you know how to insert them onto the PowerPoint page?
Are you finding them online and saving them to your desktop (or any other location)? If so, insert them as a picture. If you cannot see them, they may be behind the background image. To correct this, you could click on the chalkboard and send it to the back.
-Brit
Hi Brittany, first of all thanks a lot for very helpful tutorial. I am having difficulty in adding the dingbat. Can you please explain how can I do that. I did extract the file and installed it. But don’t know how to add to PowerPoint. Thanks
Hi Harman! Did you add a text box and change the font to the Dingbat? Then, you can add little images by typing in letters on your keyboard. Each letter represents a small image. If you look at the download folder, there should be a file that tells you which image is created by which letter. Thanks for stopping by! -Brittany
Thanks for your reply. But still can’t figure out how to change fonts to dingbat. Which PowerPoint version do i need to do this? Because I don’t think I have the latest one.
Thanks
Do you know the name of your dingbat font? Once you install the dingbat, you should see the name under the ‘Fonts’ selection in PowerPoint the next time you reopen PowerPoint.
I am having trouble getting the entire 16×20 to save. It’s showing up as only 1/4 of the chalkboard when I upload to a printing site. Tips?
Is your original image size (the PPT slide) 16″ x 20″? I usually start with that slide size and I’ve found that it coverts to the image. -Brit
Thankyou for your tips.
When i am selecting clip art ribbons (or anything for that matter) they all have white backgrounds. Is there away i can use a picture and change its background color from white to clear so you can only see the image and chalkboard background. I hope this isn’t too confusing for you to understand.
Hi there! I usually search for clip art with a transparent background. You should be able to find several options using that terminology. Thanks for stopping by! -Brit
brittany can you please give me our email address i really cant understand how to bring the fonts that i have downloaded in the printables on powerpoint it is now coming on my head
Hi Shristi! Email me at [email protected] 🙂 Once you install the fonts, they should appear the next time you open Powerpoint.
I guess walgreens wont let me customize a size?? :{ I have a white framed bulletin board that is 24×16 and created the PPT slide/JPEG that size and now cant print it. Bummer! Any tips??
Hi Laurie! I would choose to order from Office Depot/Max. They have an 18″x24″ option. Resize your slide to include the 18″, then leave at least 1.5″ open space along the sides to make sure you have room to trim off the excess so that it fits the 16″ frame. Or, you could choose to have it printed on a thicker board so you don’t have to worry about the frame sizing! Hope this helps, Brittany
thank you!
I went to each page that you suggested clicked download then i clicked on file and was asked to extract. i did that but how do i use the fonts they arent showing up
Hi Michelle! Once they fonts are in your ‘Download’ folder, double click the files to open them. You should see the font files. Double click to open the font file and hit ‘Install.’ It takes a few moments and they are then ready for you. The next time you open a Microsoft Office program, they will be in the drop down. Thanks for stopping by! -Brittany
Thank you soo much!! One more thing how do you get the clipart to work is there a certain word to type in the clipart search bar to pull up what you download??
You’ll just need to treat clip art like an image. Insert>> Image>> Browse for the Clipart location on your PC,
Where is the ‘i love’ circle from? 🙂
Hi Megan, its the circle shape and I changed the outline to the dots. Then I copied the circled, pasted it and made it a bit bigger. The ‘I love’ is 2 font boxes (Clementine Sketch & KG Second Chance)
Thanks for stopping by! -Brit
Hi there! Awesome tutorial! One question though. I wanted a little bit bigger of a picture to print. I changed the slide to 16×20 like you suggested. Since I want a bigger picture to be printed, do I have to change the slide to that size? Just wondering since you said “do as I say, not as I do” and “low resolution”. I’d like to do a 20×30 instead of a 16×20. Thank you so so much!
Hi Katie! You could change the slide only so that your proportions still looked good. Mine were that large– the resolution was low (I recev’d a warning from OfficeMax), but they still looked great 🙂 Thanks for stopping by –Brittany
Hi! I went to order from Office max and when i upload file, it turns the fonts into normal font and disorients the whole poster. What should i do?
Are you saving the file as a .jpg or.png from PowerPoint? That should ‘seal’ in the image (for a lack of better words) and you won’t have that issue. If that doesn’t correct the issue, you could try saving the powerpoint file as .PDF
Let me know if it works! -Brittany
Wich Dingbat do you use for the contour of my first birthday for Owen?
Thankyou
Hi Elodie! For the banner surrounding Owen’s “My First Birthday,” I found a free chalkboard clip art banner. Google your keywords “chalkboard banner”, “transparent background” and you should find several options. -Brittany
thank you!!! this was a huge help
No problem! Thanks for stopping by! -Brittany
Hello Britt. Do you save your slide as 16×20 and print on a 24×36 board? If yes, how is the clarity? I like to print on a 20×30 board and don’t know what size I should make my slide. Thank you!
The clarity was pretty good! I made an 18″x24″ for my MIL in May. It turned out even better and was easier to position at the party than the bigger ones we’d used before. I’d modify your slide size to 20×30 (or your preferred print size). I’d do that to make sure the height / width ratio is what you want. Definitely keep a border around the perimeter to compensate for any adjustments printing. Thanks for stopping by! -Brittany
Thanks a million! I really appreciate your quick response. : )
No problem!
how do I make a different color for names, dates etc..
Hi Kimberly, to change the font color, highlight the text and choose a different color under the text portion of the ribbon in Powerpoint. Thanks for stopping by! -Brittany
I have searched for the chalkboard banner exactly as you explained above, but I am not having any luck. I get images with a group of banners. I’ve tried selecting/deselecting “transparent” under ‘advanced search’? I’m looking for something for my grandmother who is turning 80, so was searching for something a little more elegant, as well. Please Help! I’m stuck!
Hi Sacha! I did a quick search and found 2 options.
1. http://blog.starsunflowerstudio.com/2013/03/free-chalk-board-textures-kit-adorable.html
2. http://www.freeprettythingsforyou.com/2017/05/free-chalkboard-banner-clipart/
I hope this helps and Happy 80th to your Grandma! -Brittany
Hi, Sadly I can’t open any of this lovely font & dingbats. Maybe you can help. Every time I click on the download & save button and then open file. This the message I get… Adore Acrobat Reader could not open zip, because it is either not a supported file type or because the has been damage, etc…Do you know why this is happening? I do have the latest updated. Any information would be greatly appreciated. Thank you for your time.
Hi Evy! I’m sorry to hear you are having trouble. I just clicked on the first dingbat ‘sleeping on the moon,’ hit download and it went to my Downloads folder. Then, I double clicked on the .zip folder under the download folder. Then, I double clicked on the TrueType file and hit install. It worked as expected. I’m not sure why Adobe would be giving you any trouble, it shouldn’t need Adobe at all. * I would download the file and then navigate to your downloads, rather than having it automatically Save&Open.
I hope you get it working! -Brittany
Hi Brittany. Sorry to bother you again and thank you for your fast reply. I try again but Adobe just keep opening automatically. How do a change this to avoid from happening. Any tips please, before I give up:( Thanks!
Hi, I uninstall Adobe and was able to download the file. I also sign up for your newsletter that offer a cheat sheet. But when I got the email and open the file, I got a blank sheet instead:( I need this for this week to make my special need daughter a birthday poster. Please help. Thanks,
Just wondering if it was due to uninstall Adore. Please let me know.. Thanks!
Hi Evy! I am unfamiliar with what Adobe is trying to do. You definitely don’t need it to complete the PowerPoint. After you install your fonts or Dingbats, go ahead and reinstall it. The cheat sheet is a printable for you to organize your brainstorming of what to write on the board. Happy Birthday to your little girl! -Brittany
Could you email me the banner you used please? One site the link doesnt work and the other, I get a rectangle shape with gray and white squares all on image,.
Hi Sacha! I just emailed the one I used to you 🙂 You should be able to copy it & paste over to your own file. -Brittany
Hi Brittany, I do have Power Point install on my compute, But I have never used it. I will now with you awesome fonts & dingbat. About the cheat sheet printable it still coming out blank. But I will keep trying. Can you please also email me the banner? The other websites didn’t work for me either. Thank you so much for your time & for answering all my question. I greatly appreciated.
Sure, Evy, I will send you a copy! -Brittany
Thank you so much, Brittany!
Hi Brittany, thank you so much for sharing this. I love it and am enjoying making one for my daughters first birthday. I too am having trouble finding a banner and was hoping you could also email me the one you used? Thanks in advance.
Regards,
Rebecca
Hi Rebecca! Unfortunately, I am not near a PC this week! When do you need it? -Brittany
Thank you for the great tutorial, my board turned out great and cost me a whopping $10!
I printed on a canvas at Office Depot.
Canvas would be super cool! And what a great deal. Thanks for stopping by! — Brittany
Hi, thank you for a great tutorial. I’m in process of making this for baby’s 1st birthday in about 3 weeks. i changed slide size to 16×20 as you suggested so size of ppt file is 5+ MB. However, when i save it as .jpg then it is only in 564 KB. I’m not sure if it would print properly in 16×20 size with this low resolution. Can you please advise on how to create same size jpg file as powerpoint (ppt) file?
I’ve uploaded that size into the poster print. While you may receive the low resolution warning, they’ve always turned out well for me. Thank you for stopping by! -Brittany
Hi Brittany! Thank you so much for publishing this – it is super helpful. However, I have the same issue as Ally (above) — I have downloaded font and installed the fonts, but when I insert my text box into Powerpoint, these fonts are not an option. I closed down Powerpoint, as you suggested above, and started a new file twice, and still none of the fonts I downloaded and installed are listed as options. Can you please let me know what I need to do?
Many thanks,
Jennifer.
Hi Jennifer! So you’ve downloaded and clicked “Install?” When you reopen Powerpoint have you tried to manually type in the font name in the font box? That is the only other solution I can think of. That seems odd. If the fonts are not found in Ppt, consider using Canva. You should be able to copy everything and paste into a Canva document. -Brittany
Thank you for getting back to me so quickly!!!
So…..when I install, I do get an error message that “the file C:\….. does not appear to be a valid font, but then it looks as though an installation process has been started and that it has installed.
I just tried to type the font into the font box, and although I am able to type, the font that displays is not the font that I chose (which I thought I had installed).
Thanks for all your help!
Hi Brittany, Thanks for the great tutorial.. Im in the process of making the chalkboard for my son’s first birthday. Downloaded dingbats but i m not getting clipart banner with transparent background. And not able to find animal jpg images with transparent background . Could you please help me with that .
Hi Hari! I can send you a copy of the clipart banner I used! I’m not sure which dingbats have animals. -Brittany
Thanks much for the help
Thank you very much Brittany for the perfect step by step directions. I managed to create something unique for my son’s birthday… all by myself and I feel soooo happy! I wanted to include some info in Greek so none of the fonts were applicable but I created all the headlines and numbers with the fonts you proposed and used a plain font for the rest. I am in love with dingbats, it was the extra touch! Thank you again and keep inspiring us 🙂
Ps I would love to send you my chalkboard, should I email to you?
I am so excited you were able to create your own! I’d love to see it. My email is [email protected] Thanks! -Brittany
Really loved your excellent post Brittany! i didn’t use it whole but used your powerpoint slide tip to convert my small image into a high resolution picture for print. It really saved me the day 🙂
Thanks Again
Hi awesome tutorial but can u tell me how to write on dingbats or wrap text around dingbats for example if i want to write 3 months old in between circle design or writing 0 in teeth dingbat
Hi Nosheela! You would just add a text box and write in ‘0.’ Then you would drag it over the dingbat itself. You might have to arrange the order (front to back) depending on the look you want. It would be the same for the circle. Add a shape, add a text box with text, and then drag it over it. Thanks for stopping by!
Hi Brittany,
Thank you SO much for posting this! It took me around 4 hours to complete my sons chalkboard birthday sign (probably cheaper to buy one in the long run) but I feel so good about making it myself and learning a new technique! I am conquering this at home DIY party!
Thank you! Happy New Year!
Hi Brittany,
This tutorial was super helpful. Thank you very much. Any ideas on which material is the best for print.
Thanks
Tejal
Thanks Tejal! I’ve always used the base paper and hold it up on a wall with washi tape or place it in a poster frame. Thanks for stopping by! –Brittany
Hi there – thanks for this website! I tried to order the 16×20 on snapfish and it says low resolution :/.
Any help would be appreciated. I made the PPT 16×20.
Thanks!
Z
Hi Z! Yes, it always say ‘low resolution.’ Unfortunately I’ve never been able to remove the warning, even designing smaller size prints. Just verify that the scale looks good and that your board doesn’t look stretched too wide. Thanks for stopping by!
Hi Brittany! I am having a really hard time finding free clipart with a transparent background. Is there no way to add clipart through powerpoint anymore? I have office 365 on a mac. I was trying to find things as a dingbat but even that is difficult to find what I am looking for/keep all of the PDF maps straight. Also, I can’t figure out how to add the different lines to divide the different sections of the board. Is canva easier than PP? I am really struggling! All I have so far after 3 hours is a bunch of fonts and the chalkboard background.
Oh no! It shouldn’t be that hard for you. I wonder if it’s the Mac? If you haven’t already, go ahead and use Canva. —Brittany
Hi Brittany! Turns out it was definitely the Mac. I tried canva but I didn’t like that I couldn’t use some of the fonts I had fallen in love with, lol. I am wondering if you have any time to take a look at what I have and see if you have any pointers for color/font/clipart/line use? I am hoping to have it “finished” tonight. I plan to use this as more of a milestone board to hang in his room instead of just as a one day only birthday thing. Let me know, but definitely no worries if not! Thank you so much for posting this tutorial! I could have pain someone to do it but I like that I was able to create my own.
Hi Meggen! Unfortunately it’s Easter here in the United States! I’m not on my computer for the day 🙂 You are more than welcome to send it my way at [email protected], however I won’t be able to take a look until Tuesday at the earliest.Oh– and if you downloaded any fonts, I won’t see them on my PC if I don’t have them, too. –Brittany
Hi just wanted to say awesome post and very helpful! Saved me a ton! I personally printed mine at Office Depot and bought a dollar store foam board and glued it on, it came out great and very inexpensive 😉
Yay!!! I am so happy to hear Andriana!
Hello! Trying to create one for an 80th birthday. Can you tell me what size fonts you used? I am not sure how much I can include on the slide without it being condensed and unreadable.
Thank you!
Hi Lexi! The text ranged from 94 to 144!
Where can I find more free dingbats?
I’m going for a lumberjack theme!
Thank you in advance 🙂
Hi Megan! I would search for lumberjack icons to see what comes up! {or nature & other similar themes}
Hi, I’ve tried using the chalkboard as the background, but it wont appear or doesnt allow me. Do you have any suggestions on how I can get this to work?
Hi Elisha! Are you inserting the chalkboard as an image and then typing over it? I’ve never used the chalkboard in the background component of Powerpoint, only inserting the image file. Thanks for stopping by!
I know you posted this a couple years ago… but – I found this on Pinterest and couldn’t be happier! I saw these boards on Etsy but couldn’t find one with the style and layout I had pictured in my mind. Now I’m creating the most beautiful one ever for my daughters birthday party and I’m having a blasts doing it. Thank you so much for this tutorial! You rock!
Hi Brooke! I am so happy that you are making your perfect chalkboard poster! Happy Birthday to your little one!
Hi Brittany! Thanks so much for posting this tutorial, it’s fantastic! I’m making a board for my son’s first birthday, and I was wondering if you could point me to how you made the column separators for your board?
Hi Kirsten! I think it was a line that in lieu of arrows, I made the ends circles! Thank you for stopping by!
Hi!
Thank you so much for doing this!! Downloading the fonts was a breeze cos I just click, open, install! And then it works instantly!
However, though I did the same to KG Second Chances twice, I was unable to find it in my font selection. Do you have the same problem? Maybe it is under a different name in the font list when I try to select it on Powerpoint?
Do let me know!
Hi Katrina! Did you restart Powerpoint after installing KG Second Chance? In my PPT, it showed up as the name. Perhaps you can find another fun font to use instead? Thank you for stopping by!
It WORKED!! I restarted Powerpoint and it came up!!
THANK YOU!!
Yay!! 🙂
Thank you so much for the tutorial! I am so excited to make one for my sons birthday. I downloaded two of the fonts. Then went in my downloads and clicked install, but it has been almost an hour and nothing has popped up telling me if it has completed. Is this normal? I have an HP if that helps? I am not the best with technology but I am working on getting better!
Thanks again!
Hi Jessie! I am happy to hear that you’ve found this birthday chalkboard tutorial helpful! After you installed them, have you opened Powerpoint to see if they appear?
I see them! Thank you!
Hello! I’m having trouble finding a transparent banner clip art. Do you still have the one you used that could be emailed to me? Thanks.
Hi Jenna! Unfortunately, I no longer have that computer where I made the banners 🙁
I clicked the link to download, signed up for the email subscription, but I never received an email.
NM! I tried it a second time, and it came through almost immediately. Something must have been wonky with the first time I registered.
Wonderful to hear! I was looking into it as well. Have a great weekend!
Hi Brittany,love from India can you tell me I am using 18×24 size so how much should be the size of fonts..
Hi Namita! Once you have the slide size in PowerPoint, I’d play around with the text sizes based on how many words you are going to add to each section.
Hi – first off THANK YOU – this came out so good and now I am ready to print. This is for my nephew’s birthday but I didn’t know if you printed it on any specific paper or if you did a foam board type of print? Just curious what you found to be the best?
Hi Meaghan! I’ve done it a few different ways. I’ve printed it off on white paper and used a poster frame, printed it on thicker foam board, and then paper again & washi taped it to a wall! All worked. My favorite was probably choosing the thicker board, but it did cost a bit more. To me, it was easier to prop it up and position it around. Look out for a promo code when you place your order. Good luck!
Thank you so much for being willing to share this information and the links. I’m finishing up a photo book for my daughter’s 40th birthday and needed to do a few chalkboard images. Your links and samples are perfect for several of the slides!
Wonderful to hear, Deb! Have a great time at the party!
Hi Brittany – just wanted to drop a note to say thanks so much for this tutorial! I’m not super savvy on the computer but was able to follow your easy instructions and used one of your examples as a guide to make my own. Just picked it up from Walgreens and it looks awesome. Proud to have learned something new & wanted to thank you for the great post. Happy New Year!
Hi Ashley! Thank you so much for the sweet note. I’m thrilled you were able to make your own custom poster. Happy New Year to you, too!