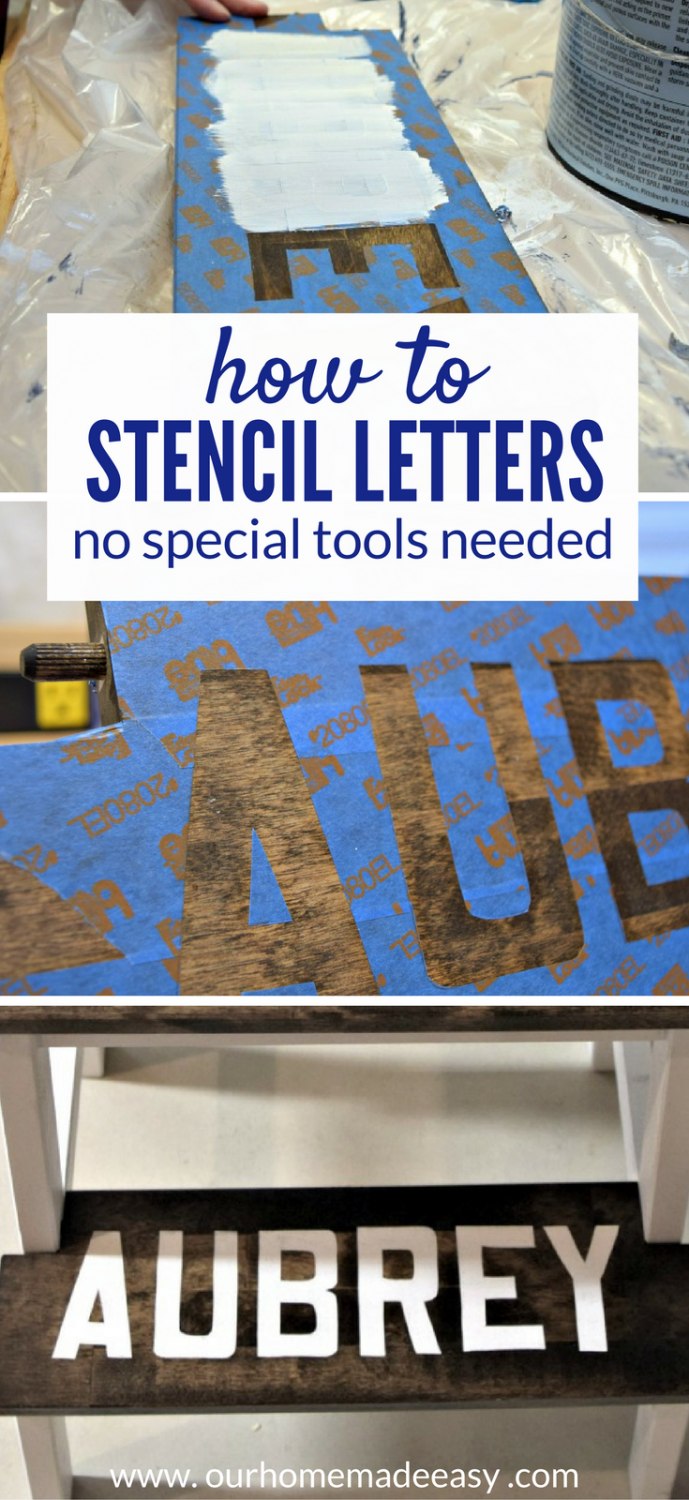
How to Stencil with Paint Perfectly! (No fancy tools needed!)
Can you believe it’s been a week since Your Life Made Easy launched? I’m over here feeling absolutely blessed with you, dear readers, and your positive feedback. It’s been so-gosh-darn amazing. While it will be awhile before I write another book, it’s always fun to talk a bit behind the scenes of our DIY filled world. But now it’s time to get back into time-saving projects…. Making stencils perfect. Yep, it’s a struggle for me, too. I cannot wait to show you how create a perfectly painted print so you’re next project looks professional.
This post contains affiliate links. If you shop from my blog, I may be compensated for clicks or purchases that you make. Thank you for supporting ‘Our Home Made Easy!’ Read my disclaimer page for more information.
When we lived in Mississippi and Alabama, I found an intense love for all things monogrammed and personalized. And I HAD to bring that southern love to Michigan. So you’ll see pops of stenciling throughout my projects.
But the hardest part of stenciling is not messing it up! It’s easier to conquer if you have a Silhouette machine. But I don’t have one yet ( 😉 hint, hint 😉 ), so I’ll show you the quick & dirty method.
But, thanks to Jordan, we found a perfect and easy solution!
I’m going to show you how to do this using the IKEA Bekvam step stool hack project. [You can see the project here!]
Items needed for Stenciling
Pencil
Stencils (we used these ones)
Paint and Polycrylic (We used leftover paint and poly)
How to stencil without fancy tools
First, select your stencil for your project. You want to make sure the spacing is right before you spend time working on something that doesn’t look ‘just right.’ I dislike wasting time on projects and I’d hate for you to do the same, too.
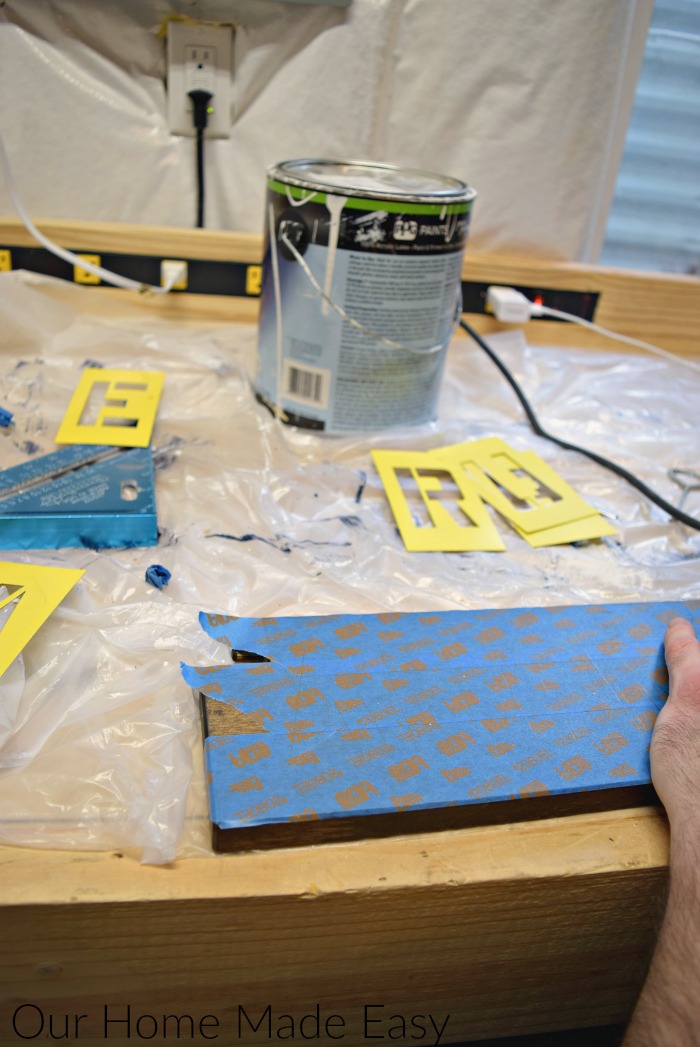
Gather your blue painters tape, a pencil, an X-ACTAO knife and your stencil.
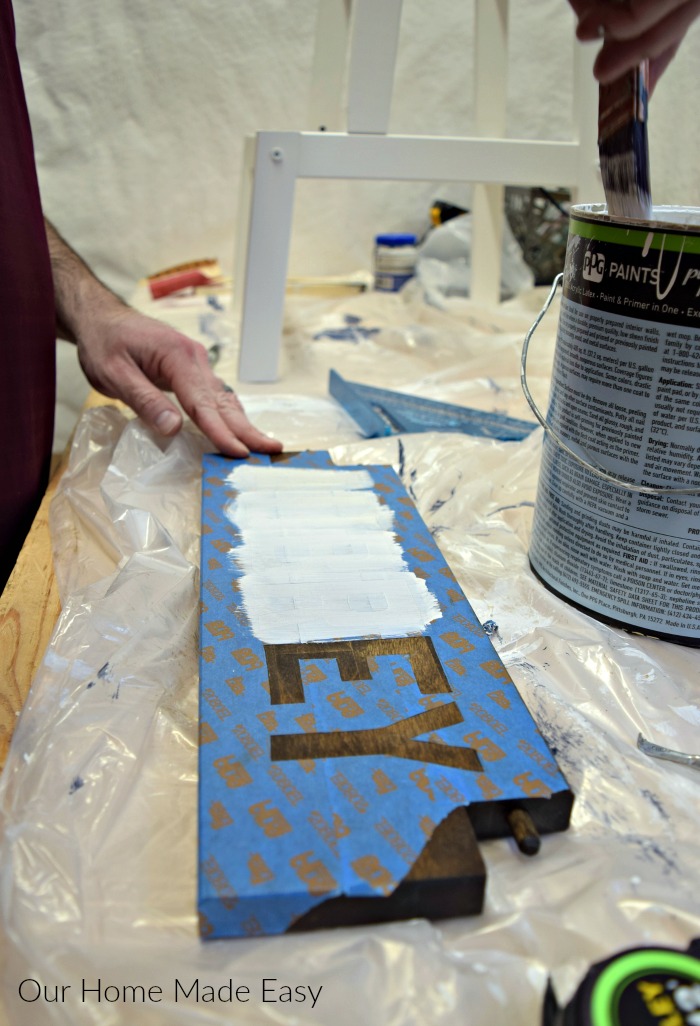
Fill your entire white space of your project with single strips of painter’s tape.
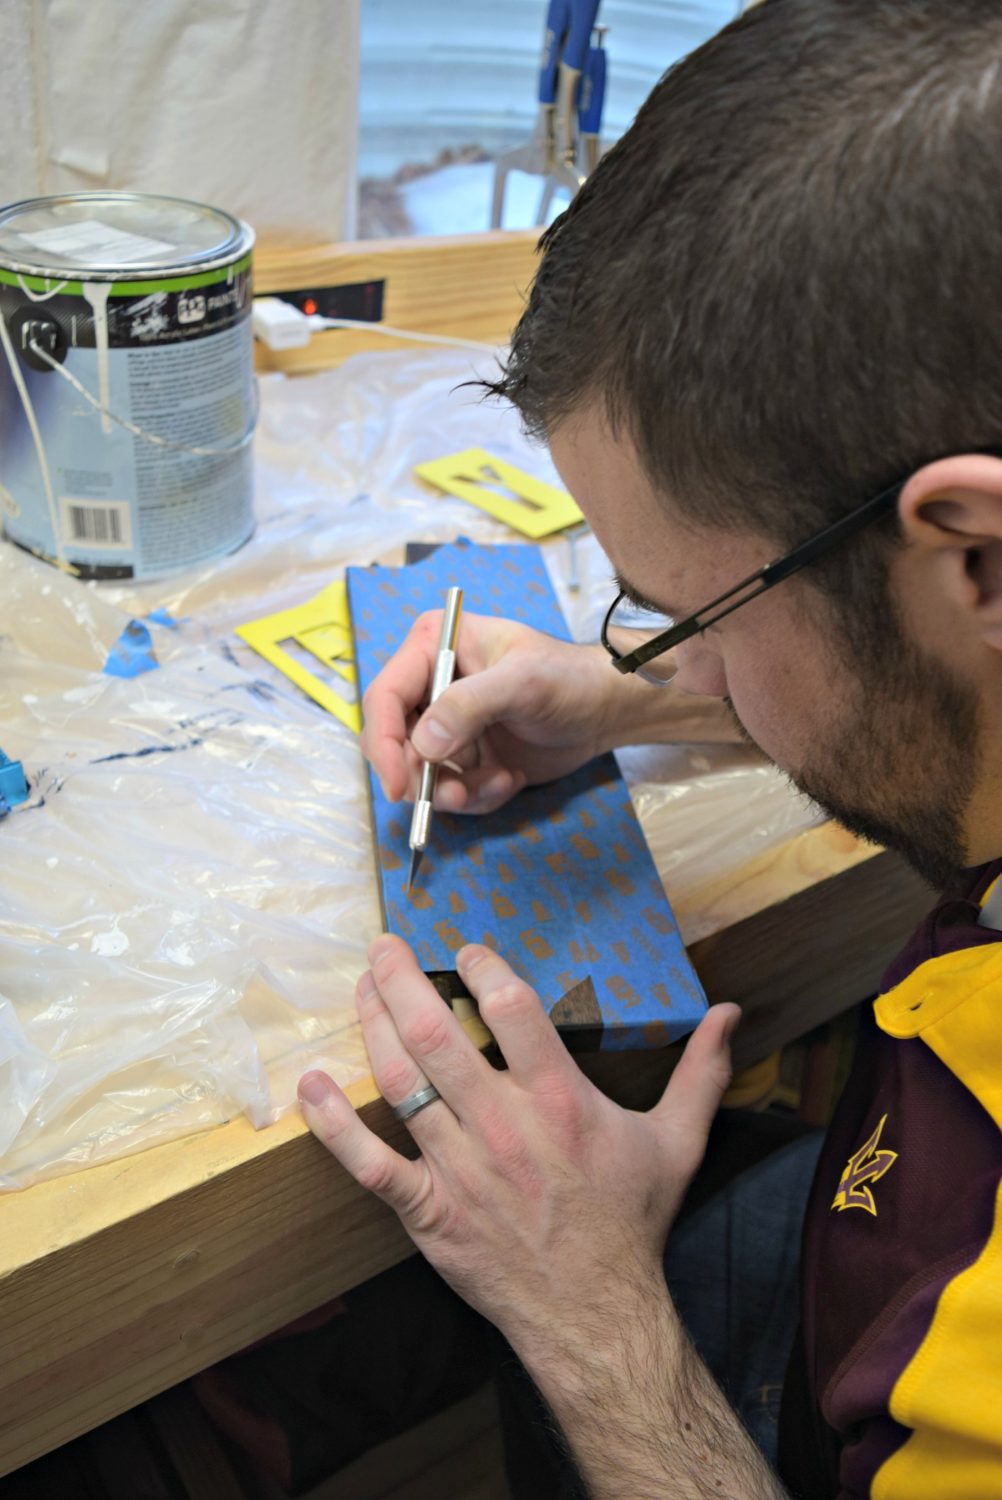
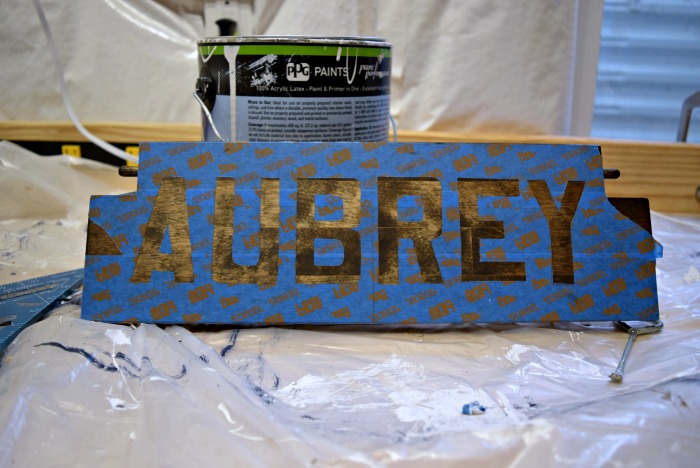
Next, lay your stencil over the tape covered area. Using your pencil, trace out your letters.
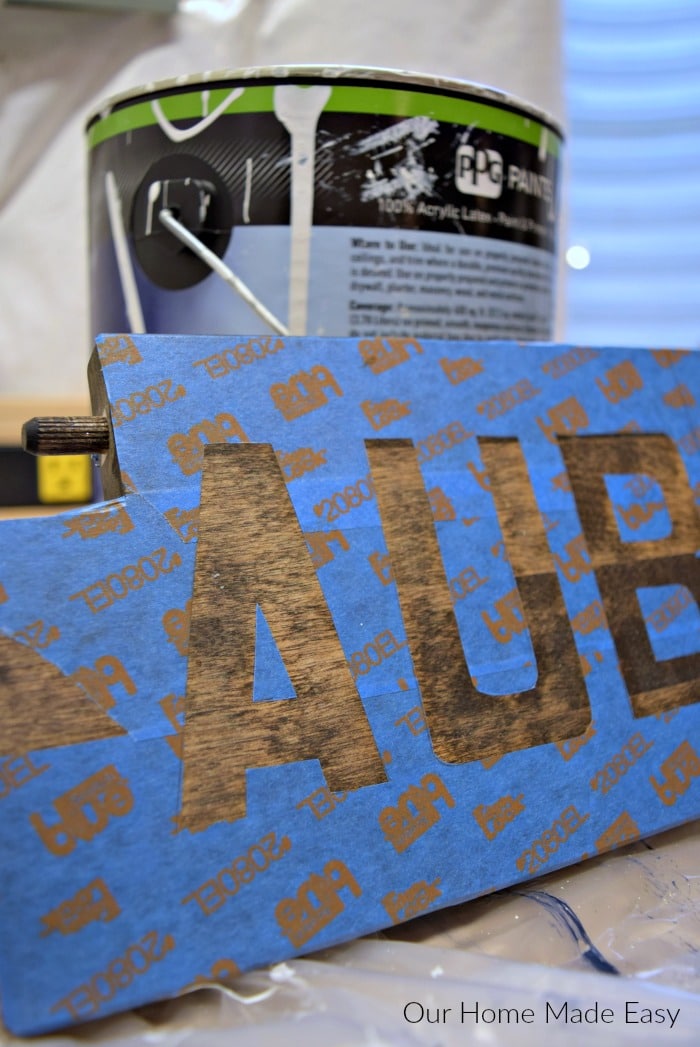
Then, use the Xacto knife to very lightly score the painter’s tape.
You see where I’m going with this?? It’s practically free and you’re creating a paint proof stencil 🙂 🙂
Peel away the scored tape.
Apply your paint to the exposed area. Allow several minutes to dry and peel away the tape.
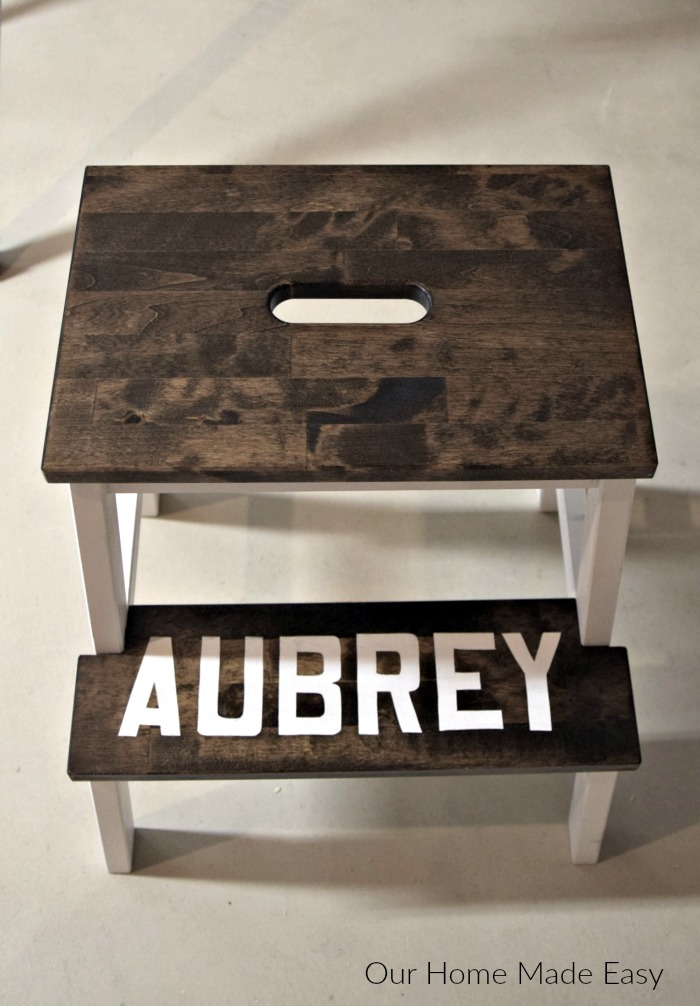
Voila– perfect stenciling without any fancy equipment! Top off your project with a coat of polycryclic. My favorite finish is matte. It will protect your project but without leaving a high-shine finish!
You can see that with some easy tools you can create perfectly stenciled letters! Now you don’t have to worry about paint smear or annoying smudges. It’s such an easy way to personalize an item and super budget friendly!

These are really great instructions – I’d love to have you share it at the Pleasures of the NW’s DIY Party!
http://www.pleasuresofthenw.com/do-it-yourself-crafty-party-47/
Thanks!
I love to write things on wood without stencils, too! I used to use my Silhouette machine ALL the time before I had kids, but it’s extremely rare that I pull it out these days. I’ve found a much easier way to transfer perfect lettering onto wood, and I love it! I’m just like you – I love names and monograms on things. Makes it so fun! (And such great gifts, especially for bridal and baby showers!) – Mauri @ http://www.theamericanpatriette.com
Hii I’m a retired old 72year old guy and like doing stuff, well my wife got me involved in painting rocks, she says Ican draw pretty good!thats her idea well I’ve tryed but not easy to paint pics. On rocks free hand, so I thought stencil ing would be the easy way out so thanks for the way with tape!
If you go to rochesterN.Y rocks on face book or maybe google, to see people doing rocks and leaving them any where some have a lable on back that tells what to do with the rock keep it or pass it on just make it and leave it, my wife saw some that we’re brought to fla. penn. arz. This started in Rochester N.Y.
People paint them travel and leave them any where! She thinks it’s a fun thing to do! Of course she’s a second grade teacher! So if any one wants to do just do it and leave it! On the back of the rocks is a lable telling the site you can print your own labels and glue them on spray clear over the lable Soit stays on and protects it, you could clear the whoe rock to protect the pic you put on!
Like I said thanks for the how to stencils ith painters tape ! Gonna try it soon!
Thanks again
Dave
Thanks Dave! I hope that you & your wife enjoy your new hobby!