The Best Christmas Grinch Cake Pops Recipe
These easy Grinch Cake Pops are a fun Christmas treat made with cake mix, frosting, green candy melts, and adorable red candy hearts! Perfect for holiday parties, classroom celebrations, or homemade gifts, they’re easy to prepare ahead of time and look so festive on a Christmas dessert tray.

(This post may contain affiliate links. Please see my Disclaimer for more information)
These adorable Grinch Cake Pops are such a fun Christmas treat, whether you’re making them for a holiday party, a classroom celebration, or a homemade gift!
Made with a prepared cake, a little frosting, green candy melts, and one tiny red heart, they’re easier to make than they look. And using a boxed cake mix is one of my favorite shortcuts when the holiday calendar is already full.
If you’ve made my easy cake pops recipe before, you’ll recognize the same simple technique. This version just adds a little Grinch-inspired Christmas magic!
What You’ll Love About This Recipe:

How to Make Grinch Cake Pops
This recipe will take you about 20 minutes to prep. Since cooking time is non-existent, your longest wait will be waiting for the candy melts to harden!
This recipe makes approximately 15 Grinch cake pops.

Grinch Cake Pop Ingredients
You only need a handful of ingredients to make these fun Christmas cake pops!

Making Grinch Cake Pops Step by Step:
Mixing the Cake and Frosting
Start with your choice of a prepared cake. It can be vanilla, red velvet, or chocolate flavor, made from a cake box. Crumble the cake into a large mixing bowl and add the white cake frosting. Mix thoroughly until you achieve a firm batter-like consistency.

Shaping the Grinch Balls
Form the cake mixture into 1 1/2” balls and set them aside.

Dip Your Cake Balls
Melt Your Green Candy Melts
In a microwave-safe bowl, melt the green candy melts in 30-second intervals, stirring in between. If the consistency needs adjustment, add a splash of oil. The result should be smooth and perfect for coating.

Stick it Right
Dip the cake pop sticks into the melted candy melts, going about half an inch deep, and then insert them into the cake balls. Repeat this process for all the cake balls. Allow the chocolate to harden, ensuring your Grinches are secure.

Coating the Grinches
Now, it’s time for the magic. Take your cake pops and dip them into the melted chocolate until they are fully coated. To allow the chocolate to harden smoothly, position your Grinches upright in a holder or foam base.

Decorate Your Grinch Cake Pops
Finishing Touches
Enhance the Grinch-y character by adding a dab of melted chocolate to the back of the red candy heart and position it slightly offset from the top of your cake pop.
Your Grinch Cake Pops are now ready to enjoy! These make for the perfect sweet treats, ideal for holiday gatherings, gifts, or even as a fun snack on the go.
Tips for Perfect Grinch Cake Pops
Cake pops are pretty simple once you get the hang of them, but a few little tricks make decorating much easier!
- Melt the Candy Slowly: Microwave the green candy melts in 30-second intervals, stirring between each one until smooth.
- Thin the Coating if Needed: If the melted candy is too thick for dipping, add a tiny amount of coconut or vegetable oil and stir until smooth.
- Secure the Cake Pop Sticks: Dip the end of each stick about half an inch into the melted candy before inserting it into the cake ball. Let the coating set before dipping the entire pop.
- Keep Them Upright: Place the dipped cake pops in a holder or foam block while the candy coating hardens.
- Add the Red Hearts: Use a small dab of melted candy coating to attach one red heart to each finished cake pop.
My tip: Set up your cake pop holder before you start dipping. It’s much easier than trying to find somewhere to put a freshly coated cake pop while holding it in one hand!

Can You Use Boxed Cake Mix for Cake Pops?
Absolutely! Using a boxed cake mix is one of the easiest ways to make these Grinch Cake Pops without adding more work to your holiday baking.
You can use vanilla, chocolate, or red velvet cake depending on your family’s favorite flavor.
Simply bake the cake according to the package directions, let it cool completely, and crumble half of the prepared cake into a mixing bowl. Then add the frosting and continue with the recipe.
My favorite shortcut: Bake the cake the day before you plan to make the cake pops. That way, it’s completely cool and ready to crumble when you start decorating.


Grinch Cake Pop Frequently Asked Questions (FAQs):
How Far Ahead Can You Make Grinch Cake Pops?
You can make these Grinch Cake Pops a day or two before your Christmas party! Once the candy coating has completely hardened, place them in an airtight container and refrigerate until you’re ready to serve.
This is one of my favorite ways to get holiday desserts finished ahead of time, especially when I’m hosting and have plenty of other things to prepare.
Can I make cake pops with a different cake flavor?
Absolutely! Experiment with different cake flavors for variety, from classic chocolate to red velvet.
What can I use if I don’t have a cake pop holder or foam base?
Get creative! You can use a tall cup filled with rice or sugar to keep the cake pops upright while the chocolate hardens.
What should I do if the melted chocolate becomes too thick for dipping?
Add a tiny splash of coconut oil or vegetable oil to the chocolate to reach the desired consistency.

Are there any alternatives to candy melts for coating?
You can use white chocolate or dark chocolate candy melts if green isn’t your color of choice.
Can I make these cake pops in advance for a holiday party?
Yes, you can prepare them a day or two in advance and store them in the fridge until it’s party time.
Spreading Christmas cheer has never been this fun and delicious. These Grinch Cake Pops are a delightful way to brighten up your holiday celebrations. Enjoy making and sharing these charming treats with your loved ones this season!
Other Christmas Treats You’ll Love:
- Grinch Golden Oreo Cheesecake Bites
- 3 Ingredient Sugar Cookie Truffles
- Cupcake Board
- Classic Gingerbread Cookies
- Super Easy Christmas Brownies
- Cake Batter Rice Krispies

Grinch Cake Pops
Perfect for parties or as sweet gifts.
Ingredients
- 1/2 prepared cake crumbled, (13x9 cake)
- 2 tablespoons of white cake frosting
- 12 oz green candy melts
- 15 red candy hearts (see note)
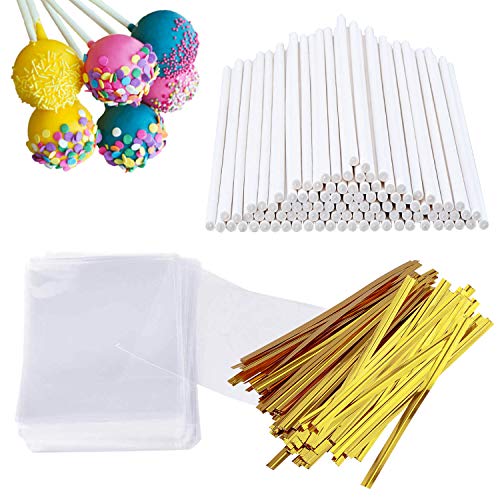
- Cake pop sticks
Instructions
- In a large mixing bowl, add the cake and frosting. Mix well until the cake becomes like firm batter.
- Form batter into 1 1/2” balls. Set aside.
- Melt the green candy melts in a bowl using a microwave. Heat 30 seconds at a time until fully melted. Add a splash of oil if needed.
- Dip the cake pop stick into the melted chocolate about a half inch. Then stick into the cake ball. Repeat for all the cake balls. Allow the stick chocolate to harden.
- Take the first cake pops to receive their sticks and dip them into the melted chocolate until fully coated. Place upright in a holder or foam base to allow the chocolate to harden.
- Add a dab of melted chocolate to the back of the candy heart and place offset from the top of the cake pop.
- Enjoy!
Notes
Separate the red from the pink hearts in your Wilton Sprinkle jar. Parent tip, take one with you to Starbucks and “order” a cake pop for the kids while you get your mid-afternoon fuel!
Recommended Products
As an Amazon Associate and member of other affiliate programs, I earn from qualifying purchases.


Nutrition Information:
Yield: 15 Serving Size: 1Amount Per Serving: Calories: 125Total Fat: 1gSaturated Fat: 0gTrans Fat: 0gUnsaturated Fat: 1gCholesterol: 4mgSodium: 27mgCarbohydrates: 28gFiber: 0gSugar: 19gProtein: 0g
(this doesn't include the boxed cake mix nutrition info)


Hi, I’m Brittany, and I believe life at home should feel easier, not heavier.
I’m the creator of Our Home Made Easy, a space for busy women who want dinner on the table, their homes running smoothly, and a little breathing room at the end of the day.
You won’t find perfection here, just realistic recipes, smart shortcuts, and simple routines that work in real life. The kind that help you feed your family well, stay organized enough, and still have time to actually enjoy it.
If you’re juggling work, kids, schedules, and everything in between, you’re in the right place. I’m so glad you’re here.